Wednesday, November 30, 2011

Forvo | A Pronunciation Guide

Forvo is a site that provides many words in many languages, pronounced. Keep in mind that this is not a translation site, but rather a pronunciation guide. If you know a word, but aren't certain on how to say it, this is a great place to visit.

All you have to do to get started is search for a word, by default it will search all languages for the word, or you can select the language. You will then see a display of pronunciations, including a map of where these words were recorded...pretty cool. Click the play button next to a word to hear it (view example, this search was for the word "school").

If you want to see more about the languages with pronounced words on the site view this page. The site currently states that it has "1,094,357 words 1,169,294 pronunciations 281 languages" and this number is growing by the minute (see what it is when you visit and compare!). Check it out by clicking here!

Wednesday, November 16, 2011

Earth Time Lapse from the ISS

So I know it's a little late, and I'm sure many people have seen this video by now, but I couldn't let this "Webby Wednesday" pass without spotlighting it. What a great opportunity to discuss the world/time zones/weather in the classroom! If you view the video from Vimeo, and scroll down a bit you will see the shooting locations in their order. Super helpful indeed! =)


Earth | Time Lapse View from Space, Fly Over | NASA, ISS from Michael König on Vimeo.

Wednesday, November 2, 2011

Virtual Tours with Photosynth Panoramics

I want to share a super cool tool that I have come across that provides a great platform for virtual tours. It's fast, easy, and would be wonderful for classroom tours and creating virtual field trips. Microsoft Photosynth is a free tool that I have known about for a while, but recently I found an aspect of it that makes it even better to use than before (at least to me =).

Photosynth's purpose is to stitch together pictures in order to create virtual environments. This can be done by making a regular synth or a panoramic. See this page for more of an explanation of the difference. My new (to me) finding is the panoramics. They create a smooth environment where you can rotate 360 degrees around a room or space. See some awesome samples here or check out my (not quite as cool but still neat) panoramic below.


There is one little bobble in this panoramic with the trees in sky, but I thought overall it did great, 
and I literally did this in no more than 2 minutes!!

  1. To get started with Photosynth you do need to create an account using a Windows Live ID (you can also create a Windows Live ID from this page). Just go to Photosynth's main site and click Create Account at the top of the page.
  2. Once you have an account you have a couple of options on creating your Panoramic. You can either use pictures taken from a digital camera and upload them using Microsoft's Composite Editor. After creating your Panoramic just click the Publish to Web button to have it publish to the Photosynth site.

    OR - If you have an iPhone or iPad - by far the easiest option is to download the FREE Photosynth app (they say a Windows Phone app is coming soon, but for you Android users that just went awwww try using this app instead (thanks Ricky!)).

    The iPhone app for Photosynth is so easy to use (it is what I used for the panoramic above). You just launch the app, tap to start, and then start moving your phone, holding still briefly when you want it to snap a pic (the Photaf app for Android looks to work similarly). Easy peasy!!
  3. When you're done making your panoramic it will publish to your Photosynth account and you can view it there by logging in. You can also choose to make your panoramic listed or unlisted (use this option if you don't want people to be able to search and find your panoramic), add highlights, and share your panoramic through email or Facebook.

I hope you try it out and have some fun!

Wednesday, October 26, 2011

Periodic Table of Videos

The University of Nottingham has provided a pretty fantastic version of the Periodic Table of Elements, where each element is a link to a video with or about the element. The videos don't seem to be more than 10 minutes in length, they are entertaining, and there is a video for each of the elements...pretty cool! Check out The Periodic Table of Videos to view this great resource.

Wednesday, October 19, 2011

National Day on Writing October 20

Wednesday, October 20 is the National Day on Writing. To support this day I thought I would post about to some great writing resources that I have come across. The first is site that is a contest for the National Day on Writing.

Figment.com Contest - Why I Write: Submissions accepting submissions from September 28 - October 29. The question is simply "Why Do You Write?". View more info from Figment: Why I Write.


QuietWrite - quietwrite.com is a an online platform for writing. It provides a clutter and distraction free screen as a place to write. Get started at quietwrite.com


Oneword - Oneword.com offers a free service site that prompts you with one word, and then gives you 60 seconds to write about that word. Ideal for high level 4th & 5th elementary and older students.


Scholastic Story Starter - A quick everyday-kind of writing activity. You just enter your name, pick your grade level, and spin the wheel to generate a story starter. I learned of this site from Cindy's blog (thanks Cindy!),  Tucker Tech Talk.

Wednesday, October 12, 2011

Make Any Pic Talk with Blabberize

Blabberize provides a great, free, easy to use application for making photos or images talk. You do not have to have an account to use it, but if you want to be able to access all of your prior Blabberize creations from the site in the future it might be a good idea to make one.

View student project examples of Blabberize here and here.

Necessary Materials...
  • Digital Picture or Image (This is what you will make speak)
  • Blabberize.com
The whole process start to finish is easy. All you have to do is follow the steps below or just view the video found at the end of this post...
  1. Go to Blabberize
    **Note - The video that you will see on the homepage of the site is funny, but I would recommend that you do not have the students view it.
  2. Click Make.
  3. Click Browse to select the picture that you would like to use.
  4. Click and drag the points around the mouth.
    **Tip - Make the side green points extend as far the edges as you want the mouth to be. The green point at the bottom will dictate the direction that the mouth moves.
  5. Click the Arrow to go the next screen.
  6. Select your sound source. At this point you can either record straight from your computer, upload a voice recording, or call in a voice recording.
    **Tip - If you don't like where the mouth placement is and want to make a change, click the small mouth icon, and then click the area to change.
  7. Once you've added your sound, click OK to complete.
  8. Save your Blabberize creation!

    Wednesday, October 5, 2011

    Online Timers that are Great for Teachers!

    So I'm revisiting a topic I have posted about before, but timers are such a great resource for classroom management, and the internet is so accessible, I think it's super wonderful to mingle the two together.

    The following are my favorites, plus a few. I have them pretty much in order starting with my favorite, but view them all to see for yourself which one you prefer :) You can view my original post about timers too if you are so inclined.

    e.ggtimer.com - There's a couple of things I really like about this timer. First, you can actually type in the time you want to use for the timer in the url, for example, e.ggtimer.com/5minutes, would automatically pull up a website with a countdown from 5 minutes. You type in any time amount here, as well as a few other cool things that you learn about on the site's main page.
    Teachit Timer - A very large, easy-to-follow output is displayed while the timer is counting down. You use sliders to input the time you would like to set. It also lets you select different final sounds. I really like the visual while the timer is counting down.


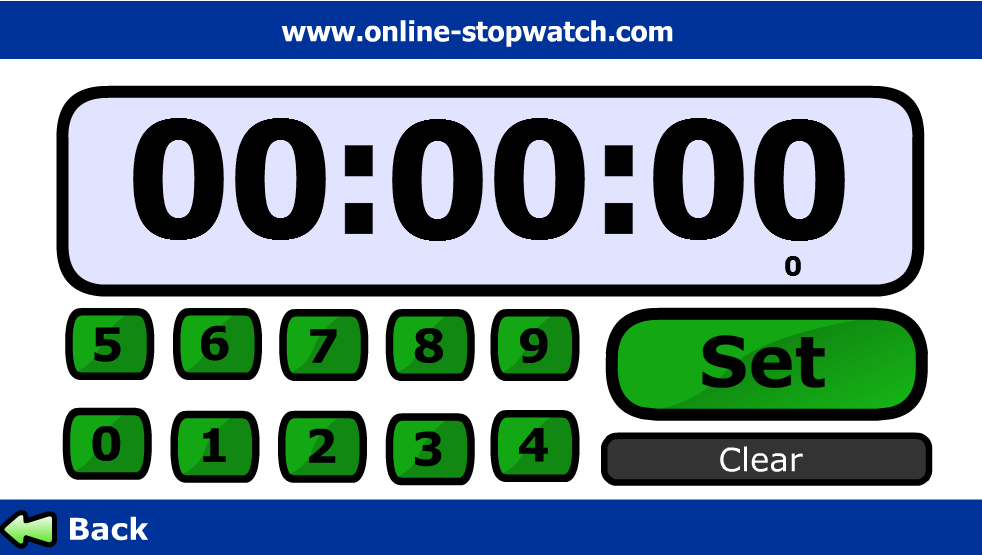
    Online Stopwatch - This site can serve as a stopwatch or a timer. To use the stopwatch click the green arrow stopwatch link. You'll then be taken to a page that will allow you to start the stopwatch. If you need go back to the main page just click the provided "back" link. To use the timer function of the site, click the "Count Down" red arrow. Use the buttons on the screen to set your time, then click the "Set" button. From here you can start the timer.
    timer.onlineclock.net/ - This is a simplistic timer that can be shown quite large on your screen. Just use the links in the upper-left to adjust the size. Use the drop-down menu under the timer to set a time. The timer will begin as soon as a time is selected.

    Class Timer - This is a little bit smaller version but it does a great efficient job. It counts up or down depending on the option that you select.